
Introduction To Java Environment
Many people utilize the highly popular programming language called Java. Java has earned renown for its flexibility and ability to perform a wide range of tasks. Let’s quickly review the Java environment, explore its popularity, and discuss its various applications
Before using Java, you need to set it up on your computer by installing the Java Development Kit (JDK). It provides you with every tool you need to use Java. Additionally, ensure that you have properly set up your Java environment. The Java Runtime Environment, also known as the JRE, is this environment, and it helps in the effective running of Java programs on your computer.
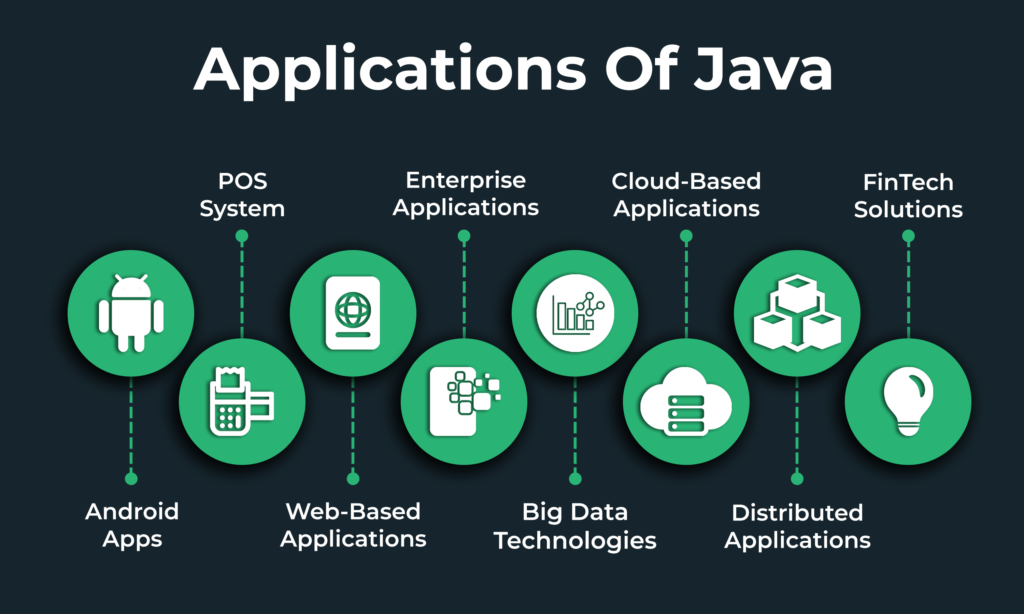
Let’s now discuss the feature in Java and what you can achieve with it. Java’s capability to run on an extensive variety of devices is one of its many wonderful characteristics.
You can utilize it to finish tasks associated with computers like installing programs or apps. Some renowned applications, such as Devil and IntelliJ IDEA, utilize Java for their development. The development of websites and web apps uses Java as well. Developers may build websites that are secure and able to handle several users at once with appropriate settings. This is amazing!
If you’ve ever used an Android phone, chances are you unknowingly utilize Java. This is because developers frequently use Java in developing mobile apps for Android. Your phone’s favorite apps serve well because of the language.
Java is also useful for managing big files. It requires producing plenty of data.
Java provides unique features for organizing and analyzing all of this data. This is crucial for conducting sophisticated data-intensive tasks like scientific research.
Smart gadgets also make use of Java. These include intelligent thermostats, exercise gear, and even intelligent cars. Java allows programmers to design programs that work on all of these various devices, providing them with “smart” abilities and allowing them to carry out amazing tasks.
Finally, financial services employ Java. It is reliable and secure, which makes it ideal for apps like stock trading platforms and financial systems. Java is a fantastic option for these systems because they need to be highly secure and reliable.
In the end, Java is a popular language for programming that has a wide range of features. You can program your computer, construct websites, create Android apps, deal with large data, build devices that are smart, and contribute to vital fields like finance and sciences by installing Java and getting your environment ready.
Importance Of Proper Java Environment
Have you ever questioned how developers build the amazing games, apps, and software that we use every day? Setting up a suitable development environment for Java programming is one of their main tasks. We’ll look at why developing the ideal Java environment is crucial and how it may significantly influence the process of creating Java programs.
How To Setup Java Environment Variables ?
Setting up a development environment for Java programming means setting the computer’s software and hardware so that you can easily create and execute Java code. Consider setting up a work environment with all the tools you’ll need to construct something remarkable.
The Java Development Kit (JDK) installation is the initial step in creating a suitable Java environment. It’s like having a toolbox full of all the resources, libraries, and tools essential to create Java programs. A Java developer requires the JDK to create software, just as a carpenter needs an inventory of tools to build a home.
After installing the JDK, you must additionally set up the Java Runtime Environment (JRE). This is comparable to the engine that powers the flawless operation of your computer’s Java programs. It ensures that your computer reads and executes the Java code you create.
Let’s now discuss the importance of setting up a suitable development environment.
Here are a few primary causes:
- Smooth Programming Experience: Creating Java code is much easier when you have the right software and hardware installed. Use features like code suggestions, auto-completion, and error checking to develop better code quicker.
- Efficient Debugging: Bugs may enter your code like little gremlins and lead to problems. Tools for debugging in a suitable development environment enable it to be easier to identify and fix these errors. Having a magnifying lens to see and get rid of those annoying gremlins is like having one.
- Faster program execution: An environment that has been properly configured makes sure that your Java codes run smoothly and efficiently. It simplifies the code execution process, leading to a quicker response for your programs. It’s like driving a car that features a high-performance engine that lets you go fast and get wherever you’re going.
- Access to libraries and tools: The Java ecosystem is huge with a wide variety of frameworks, libraries, and technologies that may simplify the life of a developer. You may easily integrate and make use of these resources to improve your Java programs and reduce your time and effort if you have an ideal environment.
Setting up an appropriate environment for programming in Java is akin to furnishing a developer’s workspace with all the necessary amenities. They can use it to write better code, debug more effectively, run programs more quickly, access significant assets, and ensure platform compatibility.
Essential Tools For Java Environment Development
Tools and Software Required for Java Environment Installation
Such as Java Development Kit (JDK), Integrated Development Environments (IDEs) like Eclipse or IntelliJ IDEA, and build tools like Maven or Gradle –
To have any interest in Java development or consider pursuing a career in Java development, it’s essential to understand the software and hardware components frequently used in the Java programming community. We’ll talk about some of the essential software and tools required for Java development, covering the Java Development Kit (JDK), Integrated Development Environments (IDEs) like Eclipse or IntelliJ IDEA, and build tools like Maven or Gradle.
- The Java Development Kit: JDK will be our primary focus. Consider it as a magic box comprising every tool you need to develop and run Java programs. The Java compiler, which transforms your human-readable code into a language that computers can understand, is an element of the JDK. In addition, it has an array of pre-written code known as libraries that offer already prepared answers for frequent problems, saving you time and effort.
- Integrated development environments: IDEs, like Eclipse or IntelliJ IDEA, serve as the next choice. These are powerful programs that offer an easy environment for developing, testing, and debugging Java code. You can think of an IDE as your virtual workplace, packed with all the tools you require. IDEs provide features like code completion, which proposes code as you arrive, error highlighting, and simple code navigation. They simplify and speed up the coding method for you.
There are many more helpful software and frameworks available for programming in Java besides these basic tools. For instance, the well-liked monitoring tool JUnit allows you to develop and run automated tests for Java code. Git is a version control system that allows you to work together with other developers and manage various versions of your code. These tools, along with many more, assist the Java development ecosystem while enhancing the efficacy and profitability of Java developers.
Installing the required software, such as the JDK, selecting an IDE that suits your needs (like Eclipse or IntelliJ IDEA), and getting comfortable with building tools like Maven or Gradle are all steps in setting up a proper Java environment.
As a result, Java programming requires an array of crucial programs and tools. The Java Development Kit (JDK) provides the necessary tools to create and run Java programs. Integrated Development Environments (IDEs), such as Eclipse or IntelliJ IDEA, offer a user-friendly coding experience. Build tools like Maven or Gradle help manage project requirements, while tools like Git and JUnit enhance the development process by enabling version control and testing. By setting up and utilizing these tools, you can lay a strong foundation for your Java programming journey. You’ll have a strong foundation for your Java programming journey by setting up and using these tools.
Purpose And Functions Of Each Tool In Java Environment
Developing Java involves using several tools, each with its distinct roles and goals.We’ll examine each tool’s function and how it affects the Java development process in this blog post. You’ll get insights into these tools’ importance and how they work together to enable Java programming by understanding their functions.
- A Java Development Kit: A key tool for programming in Java is the Java Coding Kit (JDK). It offers the assets and tools necessary to develop, compile, and run Java programs. It contains a Java compiler, which turns your machine-readable code into computer-understandable instructions. The JDK also comes with libraries, which are ready-made code snippets that assist you with performing typical programming tasks without having to start from zero.
- Integrated Development Environments (IDEs): IDEs are software tools that offer a user-friendly environment for writing Java code. Examples of IDEs are Eclipse and IntelliJ IDEA. They provide options including tools for debugging, fault highlighting, and code recommendations. Consider an IDE as your digital workstation where you may quicker develop, test, and debug your code. By automating tedious chores and making useful suggestions as you write code, IDEs make coding simpler and increase productivity.
- Create Tools: Java project management is made simpler by building tools like Maven or Gradle. They assist in managing your project’s dependencies, which are external libraries or modules. The automatic download and organization of these dependencies by Maven or Gradle ensure that your project has all the components required to run correctly.
- Frameworks for testing: Creating and running automated tests is a crucial component of software development, and Java provides frameworks like JUnit to make the task easier. Using testing frameworks, you may assure the caliber of your software, verify that your code behaves as expected, and identify and correct errors. They give you an organized mechanism to create and run tests, which makes it simpler to find and fix issues before your code is put into use.
- Version Control Systems: Git and other version control tools let developers keep track of changes to their code over time. They let you communicate with other developers, build multiple versions of your codebase, and quickly roll back to earlier versions as necessary. Version control solutions act as a safety net, ensuring the security of your code.
Every single one of these tools is essential to the Java development process. The JDK offers the tools and resources required to create and execute Java programs. IDEs improve your development experience by offering a user-friendly setting and practical tools. Building tools make task automation and dealing with dependencies easier. Through automated testing, testing frameworks let you ensure the accuracy of your code. Collaboration is made possible through version control systems, which also assist in effective codebase maintenance.
You can develop a solid basis for Java development by setting up the proper environment, which involves installing the JDK, selecting an IDE, and becoming familiar with build tools, testing frameworks, and version control systems. Together, these tools increase your efficiency, speed up the development process, and ensure the effective creation of Java applications.

Installation of Java Development Kit
Step-by-step with (screenshots) guide on how to download and install JDK on Windows-
The specific instructions for installing JDK, or the Java Development Kit, a software development environment required for carrying out Java on your PC, will be covered in this article. So let’s begin.
1. Step 0- Run a Check for Java JDK on Your PC
Before we move to the installation, though, it’s useful to see if JDK is already present in your system. To do that, go to the Start menu search bar, type in ‘cmd,’ and select the Best match.
On the Command prompt, type the following command and hit Enter:

As soon as you do that, the Command prompt will check your PC for Java. If your Windows 11 doesn’t have the JDK installed, you should see something like this on your PC:
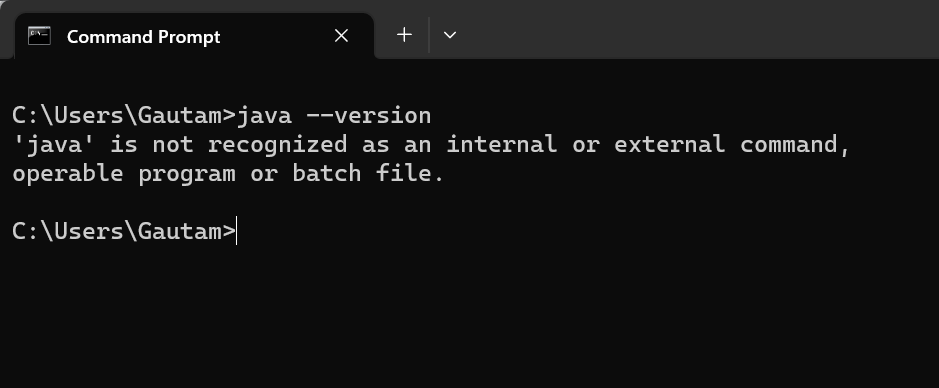
Jump to the section below for the installation instructions.
2. Step 1- Installation of Java JDK in Windows 11
We must first visit Oracle’s website to install the JDK installer. This is how:
- Go to the Java Downloads section of the Oracle website, and download the x64 Installer from there.

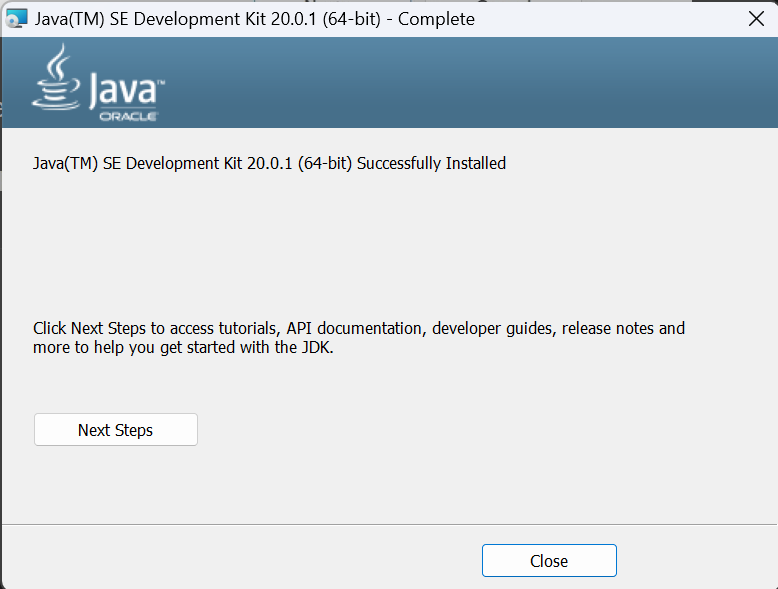
- As soon as the download completes, launch the installation file and click on Yes.
- The JDK installation wizard will be launched. In the dialog box, click on Next.
- On the next screen, you’ll be asked for the location of your file. Click on Next.
- Once the JDK installation is complete, click on Close.
3. Step 2- Setting Java Path for JDK
At the computer’s operating system level, the environment’s variables Path and Classpath exist. The classpath is used to determine which files. class location and the path is used to specify where the executable (.exe) files can be located by the system. The route is established in your Java program to use Java tools like Java, Javac, and Javap. For a compilation of code, Java is used.
- Start by accessing System Properties.
- Look for the Advanced Tab in the Properties Window. Then select Environment Variables.
- Locate the variable PATH by scrolling through the system’s variables. Click Edit after deciding on the PATH variable.
- Update the PATH variable with the Java installation path and save it.


4. Step 3- Check if JDK is installed correctly
- Check the Programs and Features menu in the Control Panel to see if Java/JDK is mentioned.
- Type java –version into the command prompt. If you obtain the version information, Java is correctly installed, and PATH has also been correctly set.
- Select Environment Variables from the Start menu’s System > Advanced > section. Verify that PATH and JAVA_HOME are both properly set.

Setting Java Integrated Development Environment
Process of installing and configuring IntelliJ IDEA
Do you feel prepared to explore the world of Java development? Setting up your development environment, which includes installing and configuring IntelliJ IDEA, an established Integrated Development Environment (IDE) for programming with Java, is one of the first things you’ll do. We’ll walk you step-by-step through how to set up IntelliJ IDEA in this blog post so that you have the perfect Java environment for your coding endeavors.
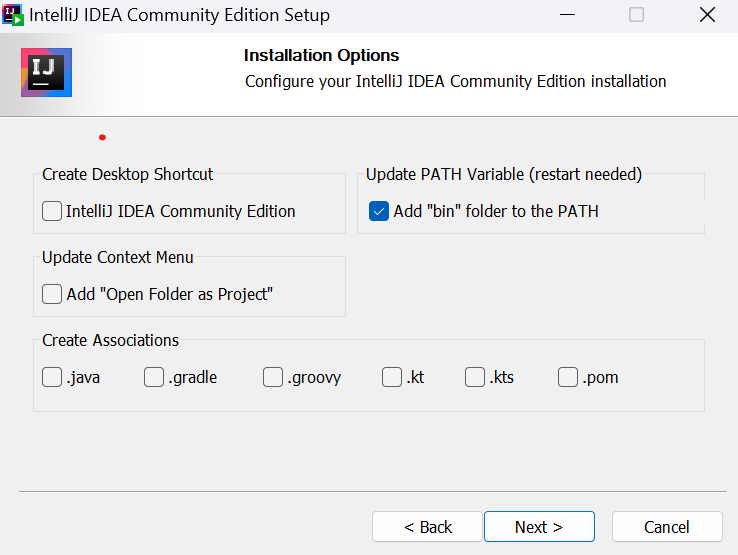
1. Step 1- Download IntelliJ IDEA First
Download the most latest version of IntelliJ IDEA from the JetBrains website to get started. The Community Edition, which is completely free and suitable for a wide range of Java development needs, is an option. Run the installer once the download process is finished, and follow the instructions displayed on the screen.
2. Step 2- You must install Java Development Kit (JDK)
Installed on your PC before you can use IntelliJ IDEA. The JDK offers the tools and resources required to create and execute Java programs.
3. Step 3- It’s time to setting Java for IntelliJ IDEA
To use the JDK after installing both of those programs. When you launch IntelliJ IDEA, a Welcome screen will appear. In the “Configure” window, click “Project Defaults” and then “Project Structure.” In the Project Structure window, navigate to the “SDKs” section and click on the “+” button to add a new SDK. Choose “JDK” from the options and browse to the location where you installed the JDK. Select the JDK folder and click “OK” to save the configuration.
4. Step 4- Start Java project
After installing IntelliJ IDEA, you can start a fresh Java project. On the Welcome page, select “Create New Project”. Choose “Java” in the left menu, then pick the project type that best meets your requirements. Name your project and identify where on your computer it is located. To create the project, click “Finish”.
5. Step 5- Begin coding
Congratulations! IntelliJ IDEA has been installed and set up successfully. You are now prepared to begin writing Java code. The user-friendly interface of IntelliJ IDEA makes it easy to write, test, and debug code. To make your development process more efficient, you’ll discover a code editor, a project explorer, and several other useful features.
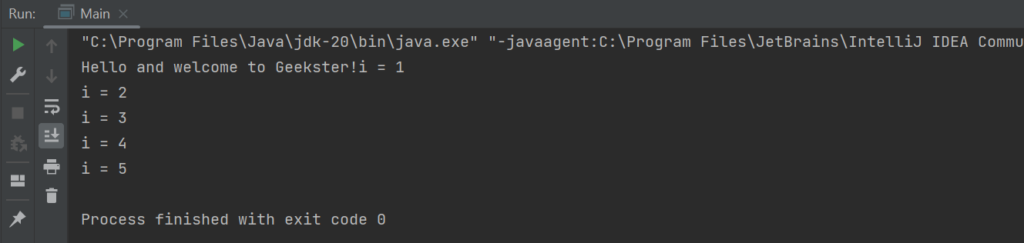
Always save your work because IntelliJ IDEA will compile it automatically and show any issues or warnings. Your Java programs can be run right from the IDE, and the console window will display the results.
An essential first step in your Java development journey is to set up IntelliJ IDEA. It offers a strong and feature-rich environment that facilitates and enhances Java coding. You can concentrate on writing good code and implementing your ideas if you have the appropriate Java settings and environment.
Features And Functionalities Of The IDE In Java Environment
That facilitate Java development, such as code editor, debugger, and build tools integration-
IntelliJ IDEA, a popular Integrated Development Environment (IDE) for Java development, boasts an array of features that enhance your coding performance.
Let’s quickly look over some of IntelliJ IDEA’s main features:
- The code editor in IntelliJ IDEA is intelligent; it reads the code you write and suggests changes as you type. It can find and highlight bugs, offering quick fixes. Navigational tools, auto-completion, and code formatting simplify code development and viewing.
- Code refactoring is made easier with IntelliJ IDEA without affecting the behavior of the code. It offers tools to safely rename variables, extract methods, and optimize imports, boosting the accessibility and structure of the code.
- Debugger: The integrated debugger in IntelliJ IDEA helps debugging simpler. To find and solve bugs in your code, you can use breakpoints, walk through the code, check variables, and analyze program flow.
- Integration with Version Control Systems: IntelliJ IDEA offers smooth integration with VCSs like Git. Built-in version control features let you manage code changes, commit and undo them, and work with others. This guarantees effective collaboration and code history monitoring.
- Build, test, and deploy Java programs using a variety of built-in tools and plugins provided by IntelliJ IDEA. The ecosystem of plugins for the IDE enables additional personalization and improvement of the development process.
- Build tool integration: IntelliJ IDEA seamlessly incorporates popular build tools like Maven and Gradle. It streamlines the development process by taking care of dependency management, project construction, and test execution.
- IntelliJ IDEA offers powerful code analysis and inspections that help identify potential problems, enabling you to create cleaner, more efficient code by identifying redundant variables, inaccessible code, and other common programming errors.
You can effectively utilize these features by configuring IntelliJ IDEA and the Java environment. IntelliJ IDEA provides Java developers with the tools they require to easily develop high-quality code. It includes an intelligent code editor, debugging features, version control integration, and an abundance of built-in tools.
Writing And Running Java Code
Process of writing Java code in the IDE’s code editor
It’s time to get some real IntelliJ experience. We will develop our first Java project in this chapter. We’ll create and run the popular Hello World program. This chapter covers the compilation and running of Java applications.
A developer has to employ IntelliJ to create a new project for anything development-related. Let’s create a project following these steps:
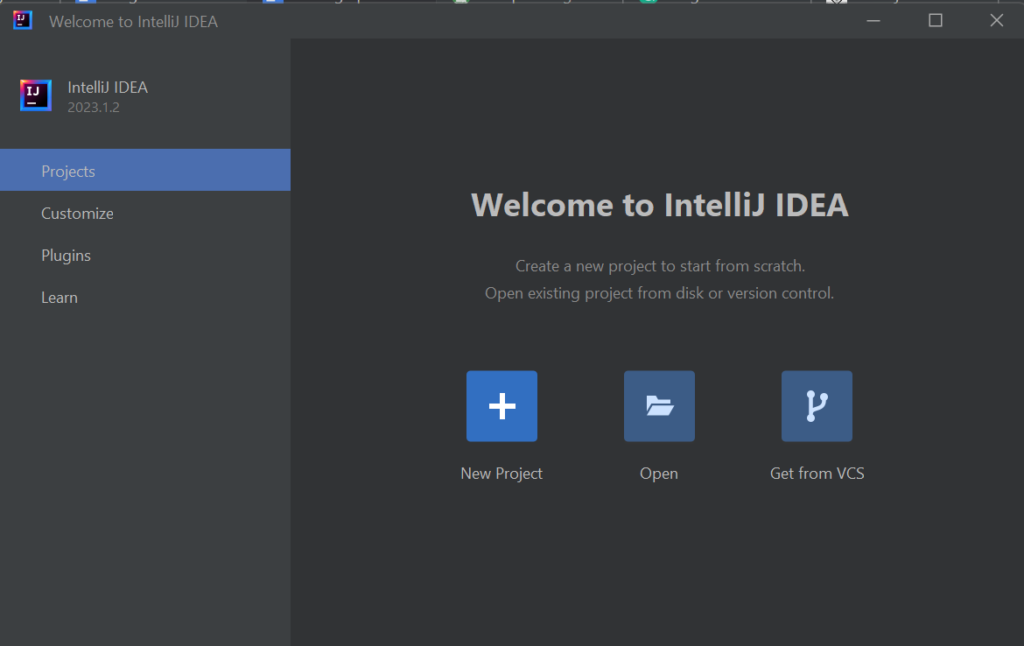
- Launch IntelliJ first.
- Select New Project from the File menu.
- Choose the proper Java project and SDK, then click the Next button. It will automatically detect JDK if you have previously installed one.
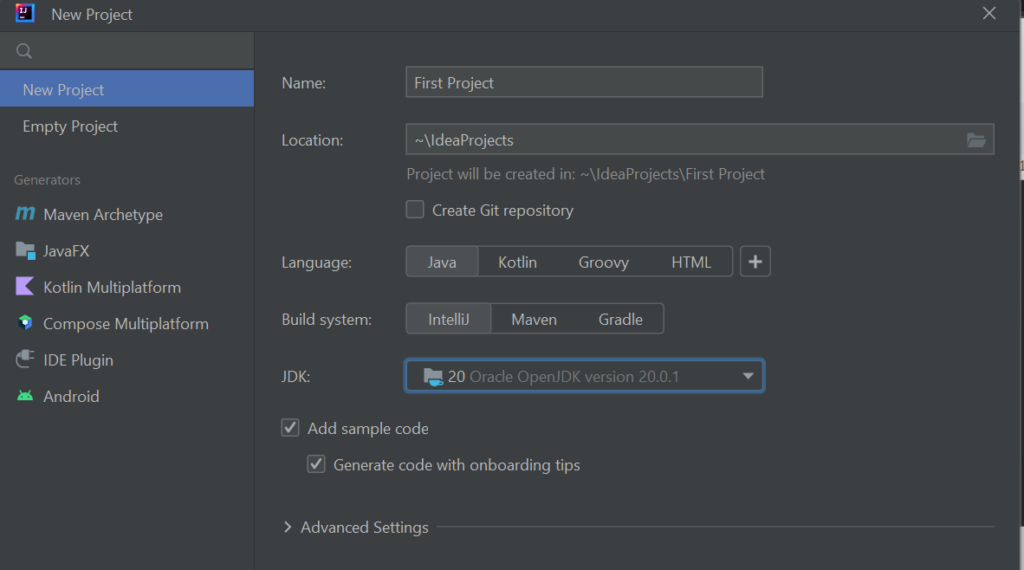
- Click on the Create button and you are done.
- Boom!, You will be displayed with your first Java Program.
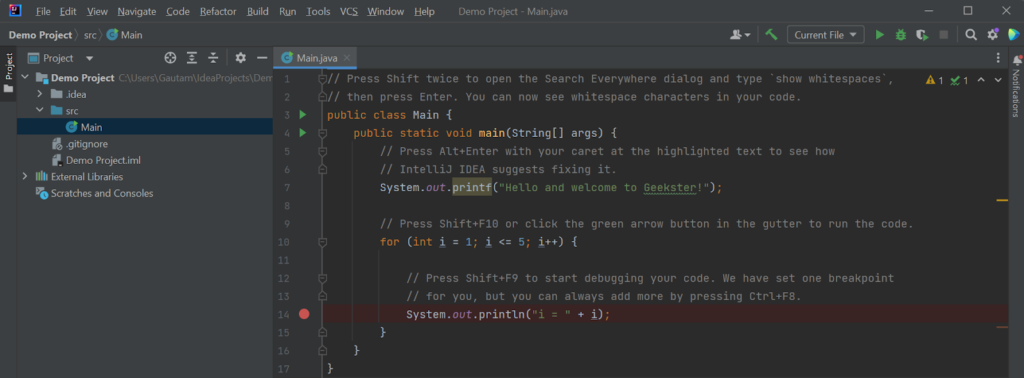
- Now run your Java Program by clicking the Run▶️ icon, or by pressing Shift + F10.
Conclusion
In conclusion, creating a Java programming environment is essential to maintain an effortless and efficient development process. Java requires the Java Development Kit (JDK) and Java Runtime Environment (JRE) properly installed on your computer to run as it is a powerful and frequently used programming language.
Java serves various purposes, including computer programming, web development, Android app development, data management, and even mobile phones. Due to its reliability and safety properties, sectors like financial services and sciences frequently employ Java.
By providing tools for efficient debugging and features like code suggestions and auto-completion, an excellent development environment enhances the programming experience. In addition, it allows fast program execution and access to tools and libraries which render coding tasks simpler.